My Etsy Shop is now open! Wow, does that take a lot of time, between sizing and formatting the images to figuring out all the shipping costs...I will absolutely have to keep adding more items to make it worth my while.
The artwork for sale includes a lot of stuff that doesn't feel appropriate on my illustration portfolio site--experimental techniques, painted objects, etc. I'm waffling between keeping a separate Etsy account for my professional work only, but I don't know if it's worth the hassle of creating another shop and managing two different things that I can't be signed into at the same time. I guess I'll see how this goes for a while.
 Oh, for those who don't know or just don't get it, the shop's name (Laurel Crayon) is an anagram of my name. It's how I derived my logo, back in art school. I still like it, so, it stays.
I did notice that someone favorited one of my items already, so that's cool!
https://www.etsy.com/shop/LaurelCrayon
 If your item is small, like a keychain fob, it will come wrapped like this. Thanks to one of my former Arts in Medicine volunteers for giving me the idea:)
Step 8:
Re-draw the image full-size on cheap copy paper. (I tape sheets
together if one isn't big enough.) Sometimes I enlarge and trace my
thumbnail, sometimes I use an intermediary sketch (like when the client
needs to see the sketch, I do a prettier one for them). Either way, any
number of departures are made at this stage; this is where I really
make use of my reference material if I need to. (Is that hair ornament
the right one for the time period? Do people's elbows really bend that
way? Is this linear perspective believable?) Erase and revise with
abandon.
 |
| Ready to paint! |
Step 9:
Prepare the final surface. When I work in watercolor or other
semi-transparent media, I don't want any eraser marks on my final
piece. So this step is just where I lightly trace the finalized step 8
(without all its messy mistakes) onto my watercolor paper. I have a 16x18" light
box for this process, which helps a lot. Then, if it's large, I wet the paper
and stretch it onto a piece of plywood or thick foam board and let it dry nice and tight to prevent warping. Any pencil marks on the paper before this step will get sealed in, so they won't smudge.
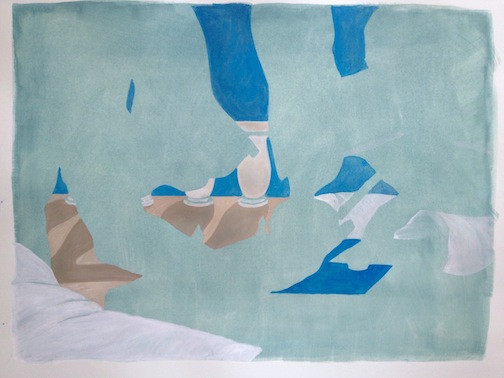
 Step 10: Painting! All the
decision-making and hard work is done; now it's time to just relax and color. For this set, I
did a light wash of color over the whole paper first, which can help keep the colors harmonious, but isn't good if you want a true,
transparent watercolor look.
Step 10: Painting! All the
decision-making and hard work is done; now it's time to just relax and color. For this set, I
did a light wash of color over the whole paper first, which can help keep the colors harmonious, but isn't good if you want a true,
transparent watercolor look.
I paint backgrounds first and figures last; I have a
tendency to go too light on the figures if I paint them against a white background. They probably taught me that in art school, but I had to do
it wrong a bunch of times before it sank in.
They probably taught me that in art school, but I had to do
it wrong a bunch of times before it sank in.
I come back afterwards and do some clean up with ink, pencil, or more
opaque
paint and a tiny brush. I'll darken, highlight or define certain areas using my
references as a guide if I have them. (In this case I didn't use much
direct reference--I only had a day to paint each of these, so the people and settings are basically made-up after glancing at some pictures.)
As soon as it's dry I pull off any tape, staples, etc., sign it, photograph or scan it, file it, package or frame it and get it
where it needs to go on time.
Have a creative and productive work day!
Update: All four finished paintings have now been sold. If you would like to commission similar ones, please let me know!

 Oh, for those who don't know or just don't get it, the shop's name (Laurel Crayon) is an anagram of my name. It's how I derived my logo, back in art school. I still like it, so, it stays.
